")


Debian I2P 패키지
Debian 혹은 Ubuntu, 모든 버전들
Debian 패키지는 대부분의 플랫폼에서 동작합니다:- Ubuntu (Bionic 18.04 and newer)
- Mint(Tara19) or newer
- Debian Linux (Buster and newer)
- Knoppix
Ubuntu, Linux Mint & Trisquel과 같은 파생 배포본을 위한 설명
커맨드 라인으로 PPA를 추가하여 I2P 설치
-
터미널을 열고 입력:
sudo apt-add-repository ppa:i2p-maintainers/i2p
This command will add the PPA to/etc/apt/sources.list.dand fetch the gpg key that the repository has been signed with. The GPG key ensures that the packages have not been tampered with since being built. -
다음을 입력하여 새로운 PPA를 패키지 매니저에 알려주기:
sudo apt-get update
이 커맨드는 그 전 커맨드로 추가된 I2P PPA를 포함한 시스템에 활성화된 각 저장소의 최신 리스트를 받아올 것입니다. - 이제 I2P 설치가 준비되었습니다!
sudo apt-get install i2p
Adding the PPA Using the Software Center
-
Open "Software and Updates" via the applications menu.
-
Select the "Other Software" tab and click the "Add" button at the
bottom to configure the PPA.

-
Add the PPA by pasting the URL:
ppa:i2p-maintainers/i2pinto the PPA dialog.
-
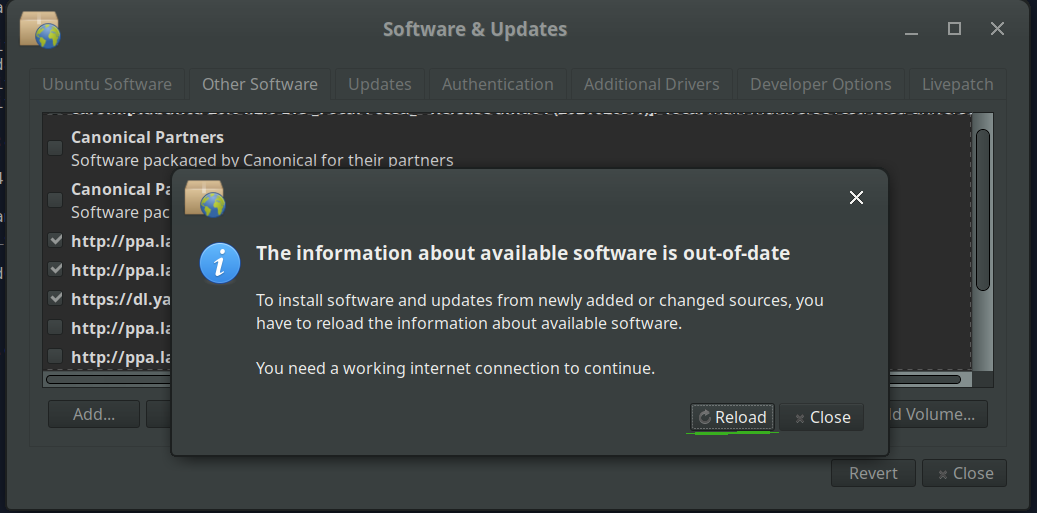
Download the repository information with the "Reload" button.
-
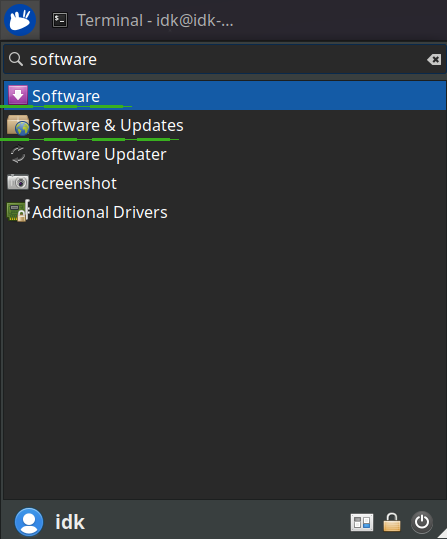
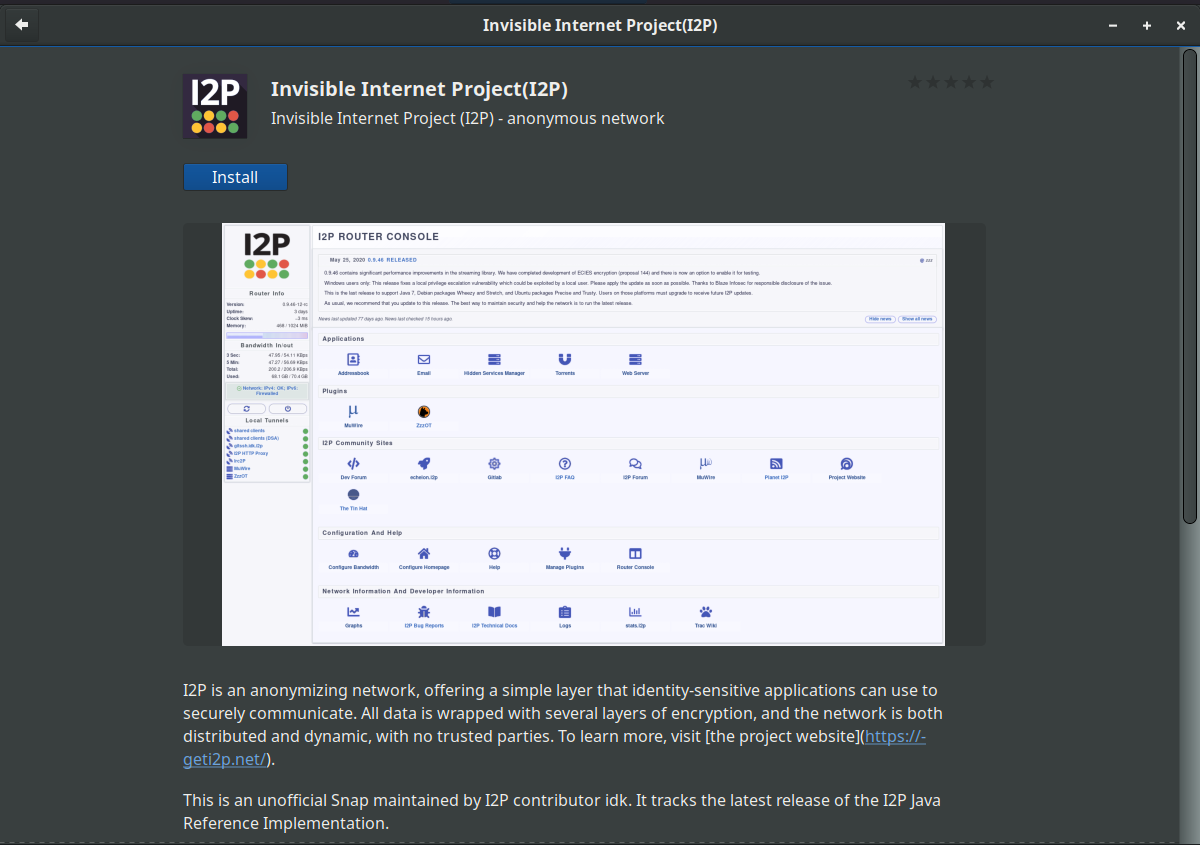
Install the I2P software using the "Software" tool from the
applications menu.
Debian을 위한 설명
NOTICE:
Our old Debian repos deb.i2p2.de and
deb.i2p2.no are EOL.
Please follow these instructions
to update to the new repository, deb.i2p.net.
알림: 이 단계들은 루트 접근을 한 채로 시행되어야 합니다 (예. su 명령어로
유저를 루트로 전환하거나 각 명령어 앞에 sudo를 붙이기).
- ,
- Ensure that
apt-transport-https,curl,lsb-releaseare installed.sudo apt-get update sudo apt-get install apt-transport-https lsb-release curl -
Check which version of Debian you are using on this page at the Debian wiki
and verify with
/etc/debian_versionon your system. Then, for Debian Bullseye or newer distributions run the following command to create/etc/apt/sources.list.d/i2p.list.
# Use this command on Debian Bullseye or newer only. echo "deb [signed-by=/usr/share/keyrings/i2p-archive-keyring.gpg] https://deb.i2p.net/ $(lsb_release -sc) main" \ | sudo tee /etc/apt/sources.list.d/i2p.list# Use this command on Debian Downstreams like LMDE or ParrotOS only. echo "deb [signed-by=/usr/share/keyrings/i2p-archive-keyring.gpg] https://deb.i2p.net/ $(dpkg --status tzdata | grep Provides | cut -f2 -d'-') main" \ | sudo tee /etc/apt/sources.list.d/i2p.list# Use this command on Debian Buster or older only. echo "deb https://deb.i2p.net/ $(lsb_release -sc) main" \ | sudo tee /etc/apt/sources.list.d/i2p.list# Use this command on Debian Buster or older only. echo "deb https://deb.i2p.net/ $(dpkg --status tzdata | grep Provides | cut -f2 -d'-') main" \ | sudo tee /etc/apt/sources.list.d/i2p.list - Download the key used to sign the repository:
curl -o i2p-archive-keyring.gpg https://geti2p.net/_static/i2p-archive-keyring.gpg - Display the key fingerprint.
gpg --keyid-format long --import --import-options show-only --with-fingerprint i2p-archive-keyring.gpg7840 E761 0F28 B904 7535 49D7 67EC E560 5BCF 1346 - Copy the keyring to the keyrings directory:
sudo cp i2p-archive-keyring.gpg /usr/share/keyrings/etc/apt/trusted.gpg.d.sudo ln -sf /usr/share/keyrings/i2p-archive-keyring.gpg /etc/apt/trusted.gpg.d/i2p-archive-keyring.gpg -
Notify your package manager of the new repository by entering:
sudo apt-get update - You are now ready to install I2P! Installing the
i2p-keyringpackage will ensure that you receive updates to the repository's GPG key.
sudo apt-get install i2p i2p-keyring
설치 절차 후에는 I2P 시작파트로 이동하여 시스템에 설정할 수 있습니다.
설치 후 작업
이 I2P 패키지를 사용해 I2P 라우터는 3개의 방법으로 시작될 수 있습니다:-
"요구에 따라" i2prouter 스크립트를 이용하세요. 간단하게 커맨드 프롬프트에 "
i2prouter start"를 입력하시면 됩니다. (참고: sudo나 root로 절대 사용하지 마세요!) -
"요구에 따라" java service wrapper(비-리눅스/비-x86 시스템에서 필요)을 사용하지 않고 "
i2prouter-nowrapper"를 사용하여 실행할 수 있습니다. (참고: sudo나 root로 절대 사용하지 마세요!) -
시스템이 부팅할때 자동으로 실행되는 서비스로, 로그인 전에도 실행 됩니다. 이 서비스는 root나 sudo를 이용하여 "
dpkg-reconfigure i2p"로 활성화 될 수 있습니다. 이 방법이 권장됩니다.
첫 설치시에는, 할 수 있다면 NAT/방화벽 설정 조정을 하는 것을 잊지 마십시오. 포워딩 해야 하는 포트들은 라우터 콘솔의 네트워크 설정 페이지 에서 찾을 수 있습니다. 만약 포트 포워드 방법이 필요할 경우 portforward.com가 도움이 될 수도 있습니다.
설정 페이지에 있는 대역폭 설정 조절을 검토하세요. 기본 설정은 꽤 낮은 96 KB/s 다운로드 / 40 KB/s 업로드입니다.
If you want to reach I2P Sites via your browser, have a look on the browser proxy setup page for an easy howto.