")


I2P-Debianpakete
Debian oder Ubuntu, Alle Versionen
Die Debian-Pakete sollten auf den meisten Rechnern mit den folgenden Distributionen funktionieren:- Ubuntu (Bionic 18.04 and newer)
- Mint(Tara19) or newer
- Debian Linux (Buster and newer)
- Knoppix
- Option 1: Neuste Versionen von Ubuntu und dessen Derivaten (Versuche dies, wenn du kein Debian benutzt).
- Option 2: Debian (inklusive Debian-Derivate)
Anleitung für Ubuntu und Derivate wie Linux Mint & Trisquel
Das PPA per Terminal hinzufügen und I2P installieren
-
Öffne eine Konsole und gib folgendes ein:
sudo apt-add-repository ppa:i2p-maintainers/i2p
This command will add the PPA to/etc/apt/sources.list.dand fetch the gpg key that the repository has been signed with. The GPG key ensures that the packages have not been tampered with since being built. -
Informiere deinen Paketmanager über das neue PPA, indem du folgendes eingibst:
sudo apt-get update
Dieser Befehl fragt jede auf deinem System eingeschaltete Paketquelle nach der neuesten Softwareliste ab. Inklusive des I2P-PPA, welches mit dem vorherigen Befehl hinzugefügt wurde. - Du kannst nun I2P installieren!
sudo apt-get install i2p
Adding the PPA Using the Software Center
-
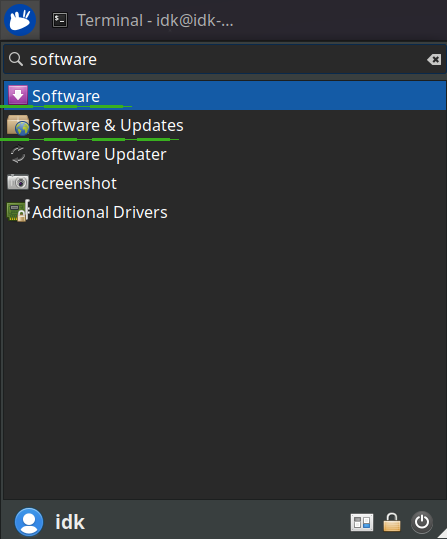
Open "Software and Updates" via the applications menu.
-
Select the "Other Software" tab and click the "Add" button at the
bottom to configure the PPA.

-
Add the PPA by pasting the URL:
ppa:i2p-maintainers/i2pinto the PPA dialog.
-
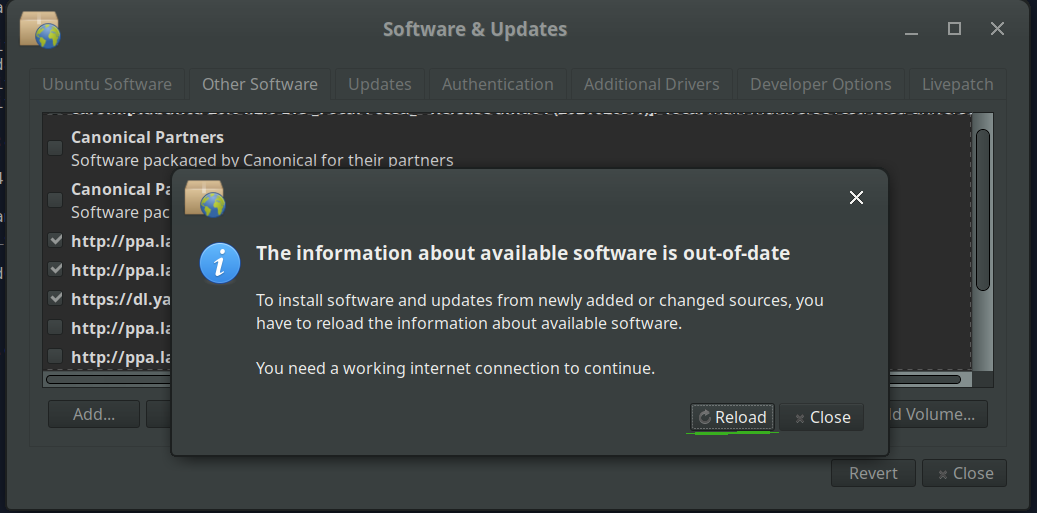
Download the repository information with the "Reload" button.
-
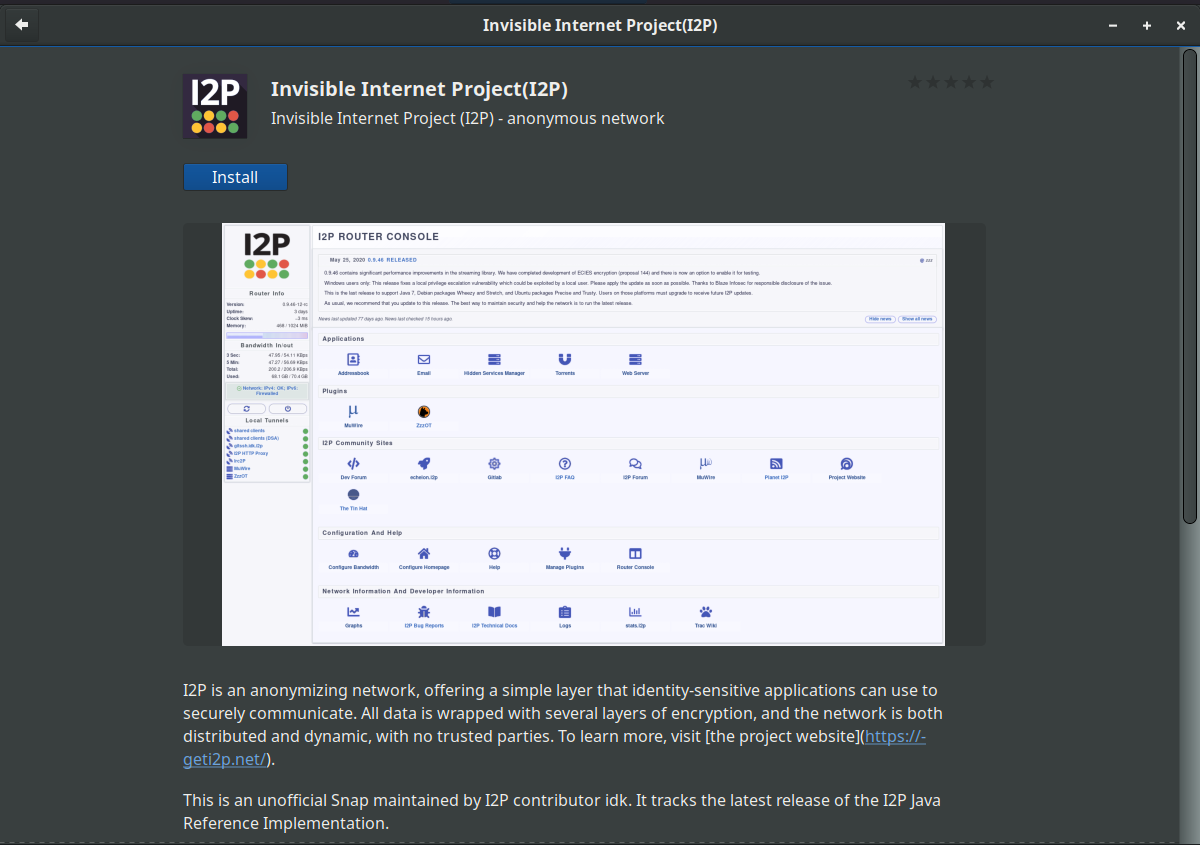
Install the I2P software using the "Software" tool from the
applications menu.
Anleitung für Debian
NOTICE:
Our old Debian repos deb.i2p2.de and
deb.i2p2.no are EOL.
Please follow these instructions
to update to the new repository, deb.i2p.net.
Hinweis: Die nachfolgenden Schritte sollten mit Root-Rechten ausgeführt werden (z.B. vorher mittels su zum Nutzer "root" wechseln oder jede Befehlszeile mit sudo beginnen).
- ,
- Ensure that
apt-transport-https,curl,lsb-releaseare installed.sudo apt-get update sudo apt-get install apt-transport-https lsb-release curl -
Check which version of Debian you are using on this page at the Debian wiki
and verify with
/etc/debian_versionon your system. Then, for Debian Bullseye or newer distributions run the following command to create/etc/apt/sources.list.d/i2p.list.
# Use this command on Debian Bullseye or newer only. echo "deb [signed-by=/usr/share/keyrings/i2p-archive-keyring.gpg] https://deb.i2p.net/ $(lsb_release -sc) main" \ | sudo tee /etc/apt/sources.list.d/i2p.list# Use this command on Debian Downstreams like LMDE or ParrotOS only. echo "deb [signed-by=/usr/share/keyrings/i2p-archive-keyring.gpg] https://deb.i2p.net/ $(dpkg --status tzdata | grep Provides | cut -f2 -d'-') main" \ | sudo tee /etc/apt/sources.list.d/i2p.list# Use this command on Debian Buster or older only. echo "deb https://deb.i2p.net/ $(lsb_release -sc) main" \ | sudo tee /etc/apt/sources.list.d/i2p.list# Use this command on Debian Buster or older only. echo "deb https://deb.i2p.net/ $(dpkg --status tzdata | grep Provides | cut -f2 -d'-') main" \ | sudo tee /etc/apt/sources.list.d/i2p.list - Den Schlüssel mit dem das Repository signiert wurde herunterladen:
curl -o i2p-archive-keyring.gpg https://geti2p.net/_static/i2p-archive-keyring.gpg - Display the key fingerprint.
gpg --keyid-format long --import --import-options show-only --with-fingerprint i2p-archive-keyring.gpg7840 E761 0F28 B904 7535 49D7 67EC E560 5BCF 1346 - Copy the keyring to the keyrings directory:
sudo cp i2p-archive-keyring.gpg /usr/share/keyrings/etc/apt/trusted.gpg.d.sudo ln -sf /usr/share/keyrings/i2p-archive-keyring.gpg /etc/apt/trusted.gpg.d/i2p-archive-keyring.gpg -
Notify your package manager of the new repository by entering:
sudo apt-get update - You are now ready to install I2P! Installing the
i2p-keyringpackage will ensure that you receive updates to the repository's GPG key.
sudo apt-get install i2p i2p-keyring
Nach der Installation kannst du I2P starten und es passend einrichten.
Arbeit nach der Installation
Unter Benutzung dieser I2P Pakete kann der I2P Router mit 3 verschiedenen Möglichkeiten gestartet werden:-
"Bei Bedarf" nutzen Sie das I2Prouter Script. Führen Sie einfach "
i2prouter
start
" in einer Kommandozeile aus. (Hinweis: Nutzen Sie niemals sudo oder als root Benutzer starten) -
"Bei Bedarf" ohne den Java Service Wrapper
(immer auf nicht-Linux/nicht-x86 Systemen) durch ausführen von"
i2prouter-nowrapper". (Hinweis: Nutzen Sie nicht sudo oder als root starten) -
als ein Service, der automatisch beim Systemstart startet, auch
vor dem Einloggen. Der Service kann mit "
dkpg-reconfigure
i2p
" als root oder mit sudo aufgerufen aktiviert werden. Dieses ist auch die empfohlene Art.
Bei der ersten Installation bitte daran denken, die NAT/Firewall-Einstellungen wenn möglich anzupassen. Die Ports, die weitergeleitet werden müssen, können auf der Netzwerk-Konfigurationsseite in der Router-Konsole gefunden werden. Hilfestellung zu Portweiterleitungen wird auf portforward.com gegeben.
Bitte kontrollieren und passen Sie die Bandbreiteneinstellungen auf der Einstellungsseite an,⏎ da die Standardeinstellungen von 96 KB/sec Download / 40 KB/sec Upload gering gesetzt sind.
If you want to reach I2P Sites via your browser, have a look on the browser proxy setup page for an easy howto.